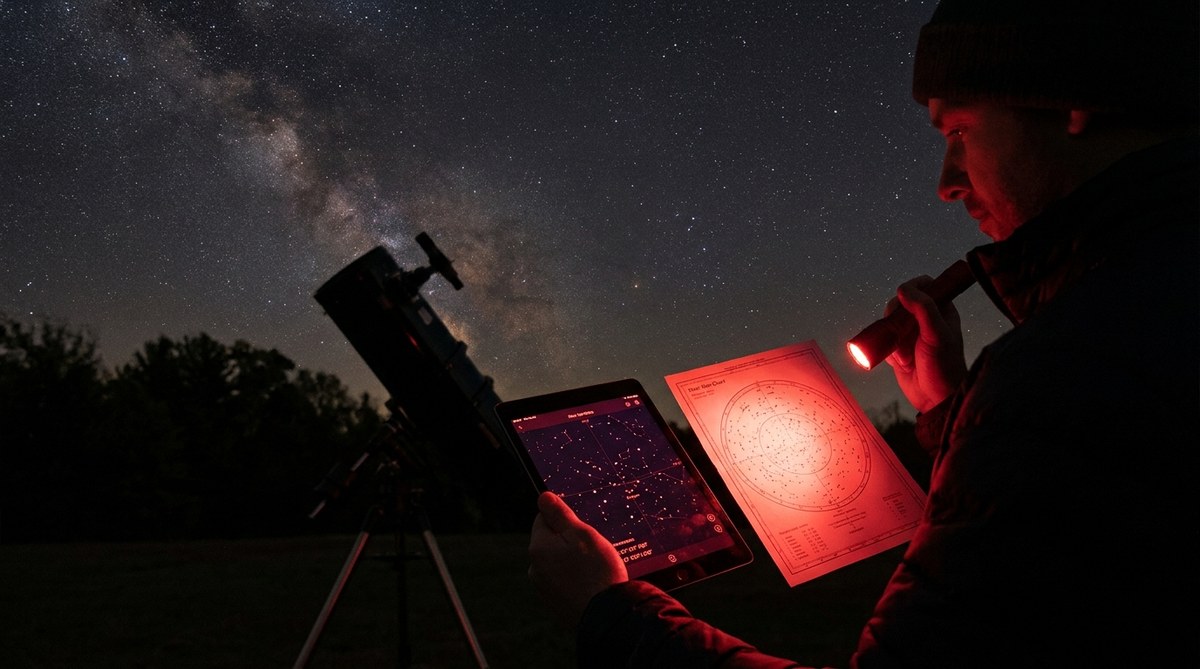
You walk outside, tilt your head back, and the sky opens up. The Milky Way looks like a faint river of milk spilling across the darkness. You pull out your phone to check a star map app, and suddenly you can not see anything. Your night vision is gone. That brilliant view of the stars vanishes in an instant, and you know it will take twenty minutes to get it back.
This is the central struggle of modern stargazing. We want the convenience of digital tools without sacrificing our dark-adapted eyes. The good news is that you can have both. You just need the right approach.
Your eyes contain two types of light-sensitive cells. Cones handle color and bright light. Rods handle low light and motion. Rods take roughly 30 minutes to fully adapt to darkness, but a single flash of bright light resets them instantly. The secret is to use digital tools that emit only deep red light, keep brightness at the lowest possible level, and train yourself to look away before tapping a screen. This preserves your night vision without giving up the convenience of star maps and apps.
Why a Smartphone Screen Ruins Your Night Vision
Your eyes work differently at night. During the day, your cone cells handle most of the work. At night, your rod cells take over. Rods are incredibly sensitive to light, but they are also very slow to adjust. When you stare at a bright screen, the rods become overwhelmed and stop sending signals. Your pupils contract. Your eyes essentially go blind to the dim light of the stars.
This is not a flaw in your eyes. It is a biological trade-off. Your eyes sacrifice night sensitivity in exchange for protection from bright light. The problem is that modern phone screens are designed for daytime use. Even at their lowest brightness setting, most phones emit enough blue and white light to destroy your dark adaptation.
The process of recovering night vision is called dark adaptation. It happens in two stages. The first stage takes about five minutes and restores some sensitivity. The second stage takes twenty to thirty minutes and gives you full night vision. If you check your phone for just three seconds during that second stage, you lose everything and have to start over.
The Science of Red Light
Your rod cells are not sensitive to red light. This is the most important fact for preserving night vision while stargazing. Rods respond to wavelengths up to about 650 nanometers. Deep red light falls above that threshold. Your rods essentially ignore it, which means your night vision stays intact.
Your cone cells can still see red light, so you can read text and see shapes. This is why every serious astronomy app offers a red light mode. It is also why astronomers have used red flashlights for decades. The principle has not changed. The tools have just gotten smaller.
There is a catch. Not all red light is created equal. Many phone screens produce a red tint that still contains small amounts of blue or green light. Your rods can detect that bleed-through. True night vision red mode uses only deep red wavelengths, typically around 620 nanometers or longer. Some apps let you adjust the exact shade of red, which gives you more control.
How to Set Up Your Phone for Night Vision
Setting up your phone for night vision takes about five minutes. Do it before you go outside, not after. Once you are under the stars, you do not want to fumble with settings.
Here is the process step by step:
-
Activate your phone’s built-in red filter. On iPhones, go to Settings, then Accessibility, then Display and Text Size, and enable Color Filters. Choose the red filter option. On Android, look for a “Night Mode” or “Red Mode” in the Accessibility or Display settings. Some Android phones require a third-party app for true red filtering.
-
Set the display brightness to the lowest possible level. Even in red mode, a screen that is too bright will still affect your night vision. Turn the brightness slider all the way down. If you can still read the screen easily, it is probably bright enough.
-
Enable the night vision mode in your astronomy app. Most major apps like Stellarium, SkySafari, and Star Walk 2 have a dedicated red mode. This overrides the normal color scheme and displays everything in shades of red. Some apps also dim the screen automatically when you enable this mode.
-
Turn off automatic screen dimming and blue light filters. These features are designed for reading in bed, not for preserving night vision. They can interfere with your red mode settings.
-
Test your setup indoors. Close your eyes for a minute, then open them and look at your phone. If the screen feels uncomfortably bright, lower the brightness further. Your goal is a screen that is just barely readable.
Common Night Vision Mistakes and How to Fix Them
Even experienced stargazers make mistakes with their digital tools. The table below shows the most common errors and the simple fixes.
| Mistake | Why It Hurts Night Vision | The Fix |
|---|---|---|
| Using the phone’s normal screen | Blue and white light triggers rod cells instantly | Enable red mode before going outside |
| Glancing at notifications | A bright notification banner destroys adaptation | Turn on Do Not Disturb and airplane mode |
| Holding the phone too close | Brightness feels more intense at close range | Hold the phone at arm’s length |
| Not covering the screen | Light spills outward and affects peripheral vision | Cup your hand around the screen |
| Using a bright watch or fitness tracker | Wrist lights create constant adaptation loss | Cover the watch with a sleeve or use a red band |
| Checking the phone too often | Each glance resets the dark adaptation clock | Plan your phone checks for every 10 to 15 minutes |
Choosing the Right Astronomy App
Not all astronomy apps handle night vision equally. Some have excellent red modes. Others just apply a red tint over a bright white interface. The difference matters.
Look for these features in an app:
- True red mode with adjustable shade
- Separate brightness control for the red mode
- A “night vision” option that dims the screen automatically
- Minimal use of bright white text or icons
- The ability to disable animations and transitions
Some apps also offer a “dark sky” mode that uses very dim red text on a black background. This is ideal. The less light your screen emits, the better.
If you are unsure which app to use, start with one that has a strong reputation for night vision support. You can find recommendations in our guide to 7 essential astronomy apps for your 2026 stargazing sessions. That guide covers specific features and settings for each app.
Physical Tools That Protect Night Vision
Your phone is not the only source of light during a stargazing session. Headlamps, car lights, and even the glow of a nearby house can ruin your night vision. A few physical tools can help.
A red flashlight is the classic solution. You can buy one designed for astronomy, or you can modify a regular flashlight by covering it with red cellophane or red tape. The key is to use a very dim red light. Many red flashlights are still too bright. Test yours by shining it at your feet. If you can see the beam clearly on the ground, it is probably too bright.
A headlamp with a red LED mode is even better. It leaves your hands free for adjusting equipment. Look for a headlamp that has a dedicated red mode, not just a red lens that covers a white bulb. The red mode should be dim enough that you can look at it directly without discomfort.
Cover your phone screen with a red filter film. You can buy adhesive red filter sheets that stick to your phone screen. These block most of the blue and white light. They are not as good as a proper red mode, but they work well as a backup.
“The best tool for preserving night vision is the one you do not use. Every time you reach for your phone, ask yourself if you really need it. If you can find the star by memory, do that instead.” — Experienced observer at the Texas Star Party
The 10-Second Rule for Using Your Phone
This simple rule will protect your night vision better than any piece of equipment. It takes discipline, but it works.
When you need to check your phone, do this:
- Close your eyes.
- Count to ten.
- Open your eyes and look at your phone.
- Find the information you need.
- Close your eyes again before you put the phone down.
Why does this help? When you close your eyes, your rod cells begin to adapt to darkness immediately. The ten seconds give them a head start. When you open your eyes, your rods are already partially adapted. The screen light still affects them, but the damage is less severe. Closing your eyes again before you put the phone down lets your rods start recovering right away.
This rule works because it forces you to be intentional about your phone use. You stop checking your phone out of habit. You only use it when you truly need it.
How to Read a Star Map Without Looking at the Screen
You can reduce your reliance on the phone screen by learning to read star maps in a different way. Print a paper star chart before you go outside. Use a red flashlight to read it. Paper charts reflect less light than a screen, and they do not emit any light of their own.
You can also memorize a small section of the sky before you go out. Look at the app indoors, find the constellation or star you want to observe, and then go outside and find it with your eyes. If you get lost, go back inside and check the app again. This method takes longer, but it preserves your night vision completely.
If you want to learn more about reading the sky without digital help, our guide on how to read the sky like a map without a telescope is a great place to start.
A Checklist for Your Next Stargazing Session
Use this checklist to prepare for a night of observing. It covers everything you need to preserve your night vision while using digital tools.
- Enable red mode on your phone and all apps
- Set phone brightness to the lowest level
- Turn on airplane mode and Do Not Disturb
- Cover your smartwatch or fitness tracker
- Prepare a red flashlight or headlamp
- Print a paper star chart as a backup
- Practice the 10-second rule
- Give your eyes 30 minutes to adapt before using the phone
- Plan to check the phone only every 10 to 15 minutes
- Keep a pair of red-lensed glasses as a spare
Why Your Eyes Need 30 Minutes to See the Stars Properly
Many beginners give up on night vision too early. They step outside, look up, and see only the brightest stars. They assume the sky is not that good that night. In reality, their eyes have not adapted yet.
The full dark adaptation process takes about 30 minutes. During that time, your rod cells become hundreds of times more sensitive to light. Stars that were invisible become visible. The Milky Way transforms from a faint glow into a detailed band of light.
If you use your phone during that 30-minute window, you reset the clock. You have to start over. This is why the first half hour of a stargazing session is the most important. Do not touch your phone during that time. Let your eyes do their work.
For a deeper explanation of this process, read our article on why your eyes need 30 minutes to see the stars properly.
Putting It All Together
Preserving night vision while using digital tools is not difficult. It just requires a shift in habits. Set up your phone before you go outside. Use red mode at the lowest brightness. Give your eyes time to adapt. And be intentional about when you look at the screen.
The reward is worth the effort. A fully dark-adapted eye can see thousands of stars. It can detect the faint glow of the Andromeda Galaxy. It can pick out the subtle colors of the Orion Nebula. These are the sights that make stargazing magical.
Next time you head out for a night under the stars, take a moment to prepare. Your eyes will thank you. And the sky will reveal more than you ever thought possible.