Your new telescope arrived today. You set it up in the backyard, aimed at the Moon, and felt a thrill. Then you tried to find Saturn and saw only a blurry white dot. Frustration set in. You are not alone. Almost every new stargazer hits these same roadblocks. The difference between a dusty telescope and a lifetime of wonder comes down to sidestepping a few predictable errors.
New astronomers often buy too much telescope, expect Hubble quality views, skip planning, crank up magnification, and forget to acclimate gear. Each mistake saps the joy out of stargazing. Fix them with realistic expectations, a simple sky map, moderate eyepieces, and patience. You will see more and enjoy it more.
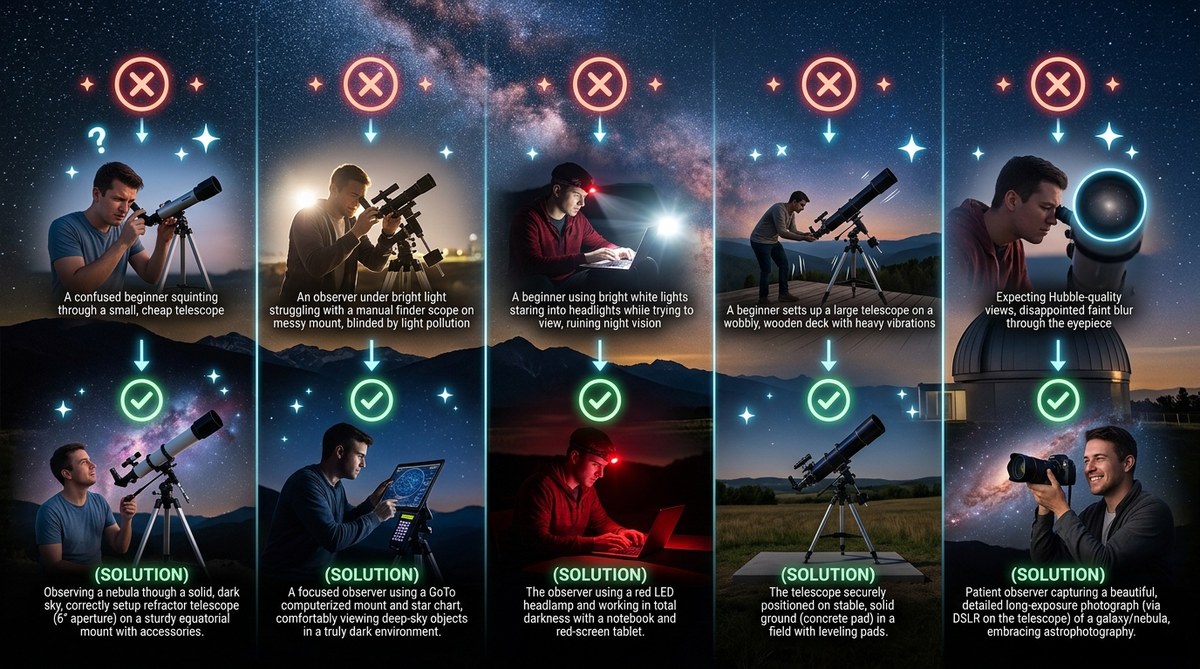
Mistake 1: Buying the Biggest Telescope You Can Afford
That 10 inch Dobsonian looks amazing in the catalog. It promises to reveal galaxies and nebulas in stunning detail. In reality, a big scope is heavy and awkward. You will dread moving it outside. Many beginners buy a large telescope, use it once, then let it collect dust.
Instead, start with something you will actually use. A pair of 10×50 binoculars lets you learn the sky without any setup at all. For a first telescope, a 4 inch or 5 inch reflector on a stable mount is portable and forgiving. You can always upgrade later. The best telescope is the one you take outside often.
For a full breakdown of what to look for, read our guide on choosing the perfect beginner telescope for your first night sky adventure.
Mistake 2: Expecting Hubble Like Views
You have seen gorgeous color images of the Orion Nebula online. You turn your telescope toward it and see a faint gray smudge. That is normal. Your eye does not collect light the way a long exposure camera does. Real time views are subtle. The magic is in knowing what you are looking at and detecting hints of structure.
Here is what you can realistically see through a modest telescope:
- The Moon: craters, mountains, and rilles in sharp detail.
- Jupiter: two or three cloud bands and its four largest moons.
- Saturn: rings as a thin oval around the planet.
- Bright star clusters like the Pleiades: dozens of stars in a sparkling group.
- Nebulas like Orion: a soft glowing patch with a brighter core.
If you want colorful images, try astrophotography later. For now, learn to appreciate the faint sights. They become more rewarding as your eye adapts. Our guide on understanding the night sky for beginners can help you know what to expect.
Mistake 3: Skipping the Planning Stage
Many beginners walk outside, point the telescope randomly, and hope for the best. That rarely works. The sky moves. Objects rise and set. Clouds can roll in. Without a plan, you waste precious time.
Instead, prepare before sunset. Follow these three steps:
- Check the weather forecast for your area. Look for clear skies and steady air.
- Choose three or four objects that will be visible tonight. Use a star chart or an app.
- Let your eyes adapt to the dark for at least 20 minutes. Avoid looking at your phone screen.
A little planning turns a frustrating night into a successful one. For a deeper look at navigating the stars, see how to start your night sky observation journey.
Mistake 4: Using Too Much Magnification
The eyepiece that came with your telescope is often a high power one. Beginners think more magnification means better views. In reality, the atmosphere limits useful magnification to about 50x per inch of aperture. Beyond that, the image gets dim and shaky. Jupiter becomes a wobbly blob.
Start with the lowest power eyepiece (the one with the longest focal length number). It gives a wider field and brighter image. Only switch to higher power when the object is high in the sky and the air is still.
Here is a quick reference table for common eyepiece choices:
| Focal Length (mm) | Typical Magnification in 700mm scope | Best For |
|---|---|---|
| 25 mm | 28x | Moon, star clusters, wide nebulas |
| 10 mm | 70x | Planets, double stars, small nebulas |
| 4 mm | 175x | Rare use on steady nights, planetary details |
Stick with the 25 mm or 20 mm eyepiece for most of your first sessions. You will see more, not less.
Mistake 5: Forgetting to Let Your Equipment Acclimate
Your telescope lives indoors where it is warm. You carry it outside into cool night air. The glass and metal are still warm. Warm optics create air currents that blur the image. That is why your first views often look wobbly.
“I learned this the hard way. My first night with a new refractor, every star looked like a dancing jellyfish. I almost returned the scope. Then a veteran observer told me to let it sit for an hour. The difference was night and day.” – Mike R., amateur astronomer since 2019
To avoid this problem, put your telescope outside 30 to 60 minutes before you plan to observe. If you have a mirror, point it at the sky and cover it with a dew shield. The tube will cool down and your views will sharpen. For reflectors, larger mirrors take longer. A 6 inch scope needs at least 30 minutes; a 10 inch needs over an hour.
For more tips on getting the best from your equipment, check out essential tips for beginners to identify celestial objects in 2026.
Turning Stargazing into a Lifelong Hobby
These five mistakes might seem small, but they block many beginners from experiencing the real joy of astronomy. A modest telescope, realistic expectations, a simple plan, a low power eyepiece, and a cooled down scope will transform your nights under the stars. You will find the Andromeda Galaxy as a faint smudge and feel connected to something immense. You will watch Jupiter’s moons dance and Saturn’s rings tilt. That feeling never gets old.
Keep a notebook of what you see. Share your observations with local clubs or online forums. And if you ever hit a frustrating night, come back to this list. The stars will wait for you. They always have.