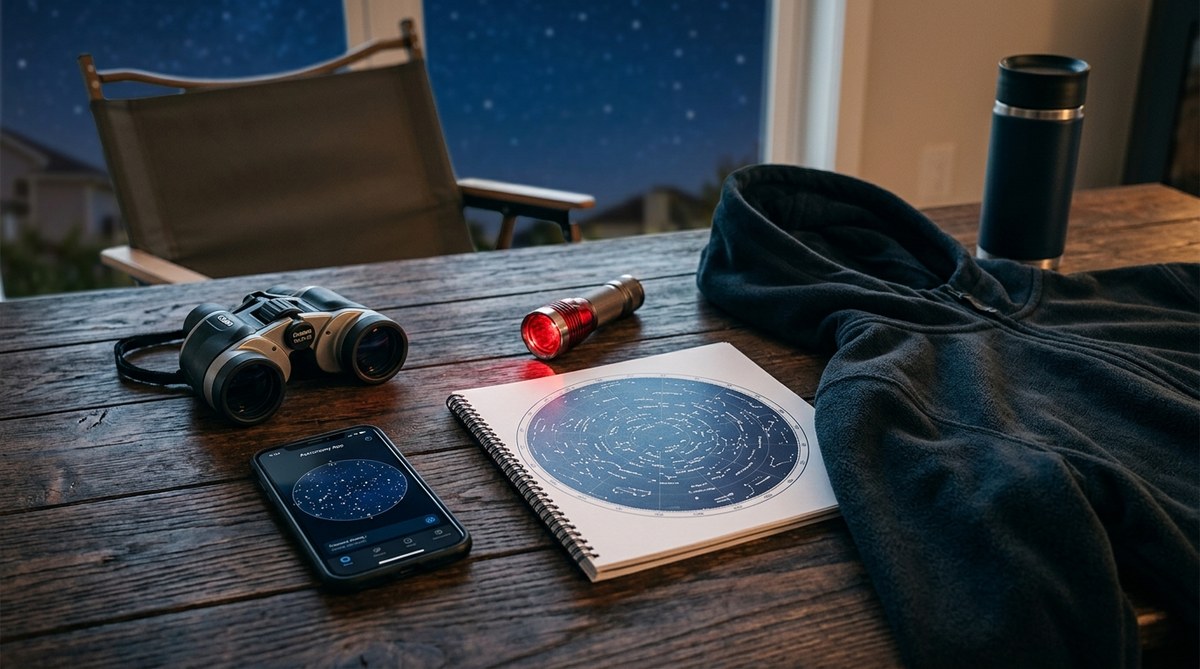
You do not need a fancy telescope to enjoy the night sky. In fact, some of the most useful skywatching tools are already sitting in your kitchen drawer, your coat closet, or your phone case. Parents looking for a simple after dark activity and curious beginners who want a low cost entry into astronomy can start tonight with items they already own. This guide walks through seven everyday objects that turn any backyard into a personal observatory.
You can observe the night sky without spending a dime on equipment. Your smartphone, a flashlight, a paper towel tube, a lawn chair, your eyes, a notebook, and a free star chart app are all you need. These simple tools help you find planets, track the moon, and spot satellites. Start with what you have and upgrade only when you are ready.
Your Smartphone Is a Powerful Skywatching Tool
Smartphones are not just for texting. They are mini computers equipped with light sensors, gyroscopes, and bright screens. With the right free app, your phone becomes a digital planisphere. Open an app like Stellarium Mobile or SkyView Lite and point your phone at the sky. The app uses your location and time to overlay star names, constellation outlines, and even satellite paths.
What you can do with it:
- Identify a bright object you see. Is it Venus or Jupiter? The app tells you in seconds.
- Set a notification for the International Space Station flyover. Many apps send alerts for visible passes.
- Track the moon phase. This helps you plan sessions because a full moon washes out faint stars.
- Record your observations. Take a picture of the star chart or snap a quick note.
One tip: turn your screen brightness way down. A bright screen ruins your night vision for twenty minutes. Many apps have a red night mode. Use that. For more details, check out our guide on how to use your smartphone for night sky astronomy.
Turn a Flashlight into a Red Light for Night Vision
Your eyes take about 20 minutes to fully adapt to darkness. A single flash from a white light resets that timer. That is why experienced stargazers use red light. Red light has a longer wavelength and does not bleach your rod cells.
You already own a flashlight. You also own red items. Here is the trick:
- Find a red balloon, a red plastic report cover, or red cellophane from a gift basket.
- Cut a square big enough to cover the front lens of your flashlight.
- Secure it with a rubber band or tape.
- Test it. The light should be dim and clearly red. If it is too bright, add another layer.
That is it. Now you can read a star chart, untangle a blanket, or find your water bottle without losing your night vision. Parents: this also makes a great quiet time flashlight for kids.
Use a Paper Towel Tube as a Simple Star Pointer
Sometimes you look up and cannot tell which star is which. A paper towel tube works like a finder scope. Hold it to one eye and look through it. The narrow field of view isolates a small patch of sky. Move the tube slowly until your target appears. This trick helps you practice pointing. Once you find a star in the tube, drop the tube and look with both eyes. Your brain will remember the position.
This is especially useful for showing children a specific constellation. Point the tube at the three stars of Orion’s belt and say “look through here.” Then let them see the belt directly. It builds the connection between chart and sky.
If you want to go further, learn how to read the sky like a map without a telescope. The tube method is a first step.
A Reclining Lawn Chair or Blanket for Comfort
Neck strain is the number one reason beginners give up stargazing after ten minutes. Standing and looking up for long periods hurts. The fix is simple: sit or lie down. A reclining lawn chair lets you tilt back and gaze comfortably for hours. If you do not have a chair, use a thick blanket on the ground. Put a small pillow under your head.
Items to bring outside for a comfortable session:
- A blanket or sleeping pad
- A pillow or rolled up jacket
- A thermos of hot tea or cocoa
- A towel to cover the chair if the ground is damp
- Your red flashlight
- A star chart (printed or on your phone in night mode)
Comfort matters because the best discoveries happen when you take your time. Settle in and let your eyes adapt. For a full checklist, read how to plan your first stargazing session in 2026.
Your Own Eyes and a Bit of Patience
Your eyes are the most versatile tool you own. With dark adaptation and a clear sky, you can see dozens of stars, the Andromeda Galaxy (as a faint smudge), the Orion Nebula, and even the moons of Jupiter when conditions are perfect. Do not underestimate them.
What you can see with the naked eye:
- Planets like Venus, Mars, Jupiter, and Saturn (they shine steadily; stars twinkle)
- Meteor showers (peak nights offer 10 to 20 meteors per hour)
- The Milky Way band from a dark location
- Satellite passes, including the ISS
- The changing moon phases and earthshine
The key is patience. Give your eyes 15 to 20 minutes in the dark. Avoid looking at any white light during that time. If you need a break, close one eye while you check your phone. That keeps one eye dark adapted.
For a deeper look at what is possible, see our list of 7 surprising night sky objects you can see without a telescope.
A Notebook and Pen for Sky Logging
Professional astronomers use observation logs. So can you. A simple spiral notebook and a pen become a record of your night sky journey. Write down the date, time, location, and what you saw. Note the weather, the moon phase, and any interesting details.
What to log each session:
| Field | Example |
|---|---|
| Date and time | January 15, 2026, 8:30 PM local |
| Location | Backyard, suburban yard, light pollution moderate |
| Sky conditions | Clear, slight haze, no moon |
| Objects seen | Orion Nebula (fuzzy patch below the belt), Jupiter (bright, no clouds) |
| Tools used | Eyes, smartphone with red mode |
| Notes | Saw a satellite pass at 8:42 PM; got cold after 30 minutes |
Logging helps you notice patterns. You will learn which nights have better transparency. You will remember which constellations were high in the sky. Over a month, your log becomes a personal guide. If you want to improve your identification skills, read essential tips for beginners to identify celestial objects in 2026.
Free Star Chart Apps and Printable Charts
You do not need a printed star atlas. Free apps and websites give you an up to date map of the sky for your exact location. But there is a catch: you must use them correctly.
Common mistakes and how to avoid them:
| Mistake | Solution |
|---|---|
| Using the app in bright white mode | Switch to red night mode before going outside |
| Holding the phone too close to your eyes | Hold it at arm’s length to preserve night vision |
| Relying only on the app without looking up | Use the app to find a target, then put the phone away |
| Forgetting to check your location settings | Enable GPS or manually enter your city |
| Not learning the basic constellations | Use the app to identify one new constellation per session |
A printed star chart is a great backup. Print one from the internet, put it in a clear plastic sleeve, and use your red flashlight to read it. That way you are not dependent on your phone battery.
For a beginner friendly guide to reading charts, visit learn how to read star charts for beginners.
Expert advice: “The best tool is the one you already have in your hand. Do not wait for perfect gear. Go outside tonight with just your eyes and a chair. The sky will teach you the rest.”
Dr. Maria Reyes, astronomer and host of the weekly Stargazing at Home podcast
How to Prepare for a Skywatching Session in Five Steps
Use this numbered list to get ready fast. It works for any backyard or balcony.
- Check the weather and moon phase. A clear night with a new or crescent moon is best. Download a weather app and check cloud cover.
- Pick a target. Decide what you want to see: a planet, a constellation, or a satellite. Use your star chart app to find when it is highest in the sky.
- Set up your tools. Lay out the blanket or chair. Prepare your red flashlight. Charge your phone. Put your notebook and pen nearby.
- Go outside early. Give yourself ten minutes to adapt to darkness before you start looking.
- Start with the easiest object. Find the moon or a bright planet first. Then work your way to fainter targets.
This routine builds confidence. You will spend less time fumbling and more time looking up. For a more detailed plan, read how to start your night sky observation journey.
Why These Simple Tools Work
You do not need a thousand dollar telescope to have a rewarding night sky experience. The tools you already have at home remove the barrier of cost. They also remove the barrier of complexity. A paper towel tube, a red flashlight, and a smartphone let you practice the core skills of astronomy: finding objects, tracking motion, and recording observations.
These skills translate directly to using better equipment later. When you eventually buy a scope, you will already know how to align it, how to read a chart, and how to protect your night vision. The hobby becomes more fun because you are not starting from zero.
So tonight, grab a chair, step outside, and look up. Use your phone to identify that bright star in the southwest. Log it in your notebook. Tomorrow night, look for it again and notice how it moved. That is the real magic. You do not need a laboratory. You need a clear sky and a few objects from your home.